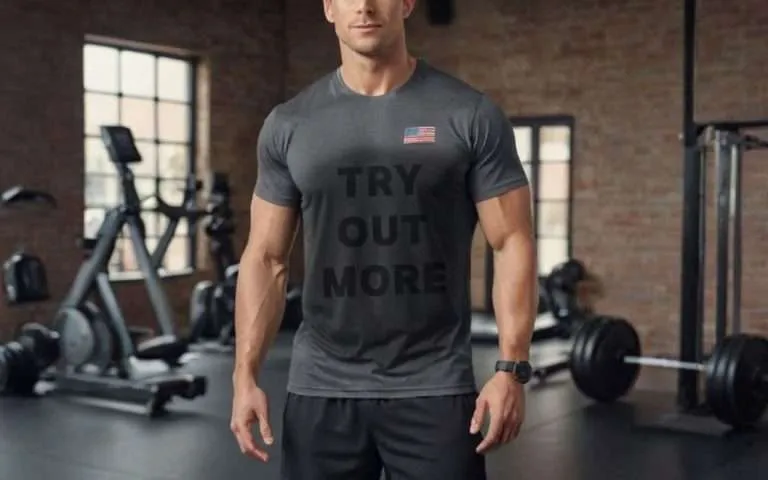
Your Reliable High Quality Wholesale Custom Clothing Manufacturers
How to Master T Shirt Printing Techniques: A Step-by-Step Guide for Beginners
The t-shirt printing industry has seen remarkable growth. DTF printing alone showed an incredible between 2020 and 2024.7420% increase in search interest This rise is largely due to advancements in various t shirt printing techniques.
Screen printing works best for orders above 50 pieces, while DTG printing needs a $10,000+ equipment investment. Each method brings something special to the table. Screen printing saves money on large orders, and dye sublimation creates bright all-over prints on polyester fabrics.
Starting a t-shirt printing business might seem daunting at first. We created this detailed guide to help you understand every printing technique, from classic screen printing to new digital methods. Ready to become skilled at t-shirt printing? Let’s take a closer look!
Understanding Different T-Shirt Printing Methods
Your custom apparel project needs the right t-shirt printing technique. Each method has its own advantages based on your fabric choice, design complexity, quantity, and budget. Let’s look at four popular t-shirt printing methods to help you pick the best one for your project.
Screen Printing: The Traditional Approach
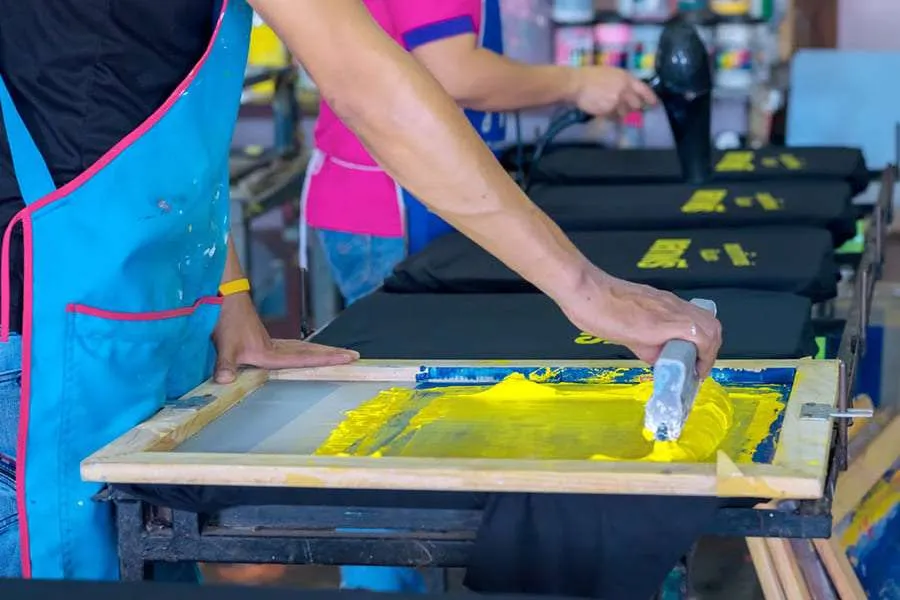
Screen printing remains one of the oldest and quickest t-shirt printing techniques in the industry. This proven method creates bright, lasting designs through a process that uses stencils, mesh screens, and a squeegee to transfer ink onto fabric.
The technique works great on natural fabrics like cotton, silk, and wool. These materials allow the ink to absorb well for bright, lasting prints. Screen printing really shines with bold, simple designs that have solid color areas—perfect for logos and text.
Screen printing becomes more economical with bulk orders. The setup costs go up with each color in your design because you need separate screens. However, the price per unit drops by a lot as order quantity increases. This makes it ideal for large batches of the same design, especially those using fewer colors.
Direct-to-Garment (DTG): Digital Precision
DTG printing shows off state-of-the-art technology in the t-shirt printing world. Like paper printing, DTG printers spray water-based inks directly onto pre-treated fabric to ensure the ink sticks properly.
DTG works best on 100% cotton shirts because cotton absorbs ink better. DTG stands out by handling detailed designs with unlimited colors, creating precise, photo-quality results with complex gradients. The ink blends into the fabric naturally and leaves a soft feel with no texture.
Small businesses and individual creators who make custom apparel in small quantities will find DTG perfect. Low setup costs and economical one-off printing make it the go-to choice for print-on-demand services and personalized designs.
Heat Transfer Vinyl: Versatile and Available
Heat transfer vinyl (HTV) printing has gained popularity, especially for sports jerseys and athletic wear. This simple technique cuts designs from colored vinyl sheets and transfers them onto shirts with a heat press.
HTV gives great results on fabrics that can handle high temperatures. You’ll get bright, eye-catching prints in various colors and finishes including matte, metallic, and glitter effects. A well-made HTV print lasts about 30-40 wash cycles.
Beginners love HTV because it’s easy to start. You just need basic equipment—mainly a vinyl cutter and heat press—to create professional-looking apparel on a tight budget. The process stays cleaner than other methods too.
Dye Sublimation: All-Over Printing Solution
Dye sublimation lets you create true edge-to-edge designs on t-shirts. The process starts by printing onto special transfer paper. Heat then turns the ink into gas, which bonds permanently with fabric fibers.
Dye sublimation works specifically with synthetic fabrics, and polyester gives the best results. This method produces detailed, bright designs that cover an entire garment from seam to seam.
The final product has many benefits: the print becomes part of the fabric instead of sitting on top. This creates breathable shirts with designs that won’t fade, crack, or peel. While sublimation looks amazing on light-colored polyester, it doesn’t work well with dark fabrics or cotton materials.
Understanding these t-shirt printing techniques helps you make smart choices about which method fits your project best, giving you the results you want for your custom apparel.
Essential Equipment for T-Shirt Printing
You’ll need specific equipment to start your t-shirt printing technique operation. The quality of your final products depends on the right tools, whatever printing method you choose – screen printing, DTG, or heat transfer techniques.
Simple Tools Every Beginner Needs
Your essential equipment list changes based on the t-shirt printing technique you prefer. Heat transfer printing gives you an easy way to start, and you’ll need:
- A quality heat press machine with heated metal plates to transfer designs onto shirts (manual ones work great for beginners, electric ones for bigger production)
- A vinyl cutter to prepare designs precisely for heat transfer
- Transfer paper that matches your fabric colors (light transfer paper for light fabrics, dark transfer paper for dark garments)
- High-quality ink to create vibrant, lasting designs
Screen printing needs frames, screens, squeegees, and inks. The makes a great starting point and comes with frames, screens, squeegees and vibrant inks.Speedball Intermediate Kit
Direct-to-garment printing starts with a printer like the Epson SureColor P600, which gives you high-resolution prints and great color accuracy. You’ll also need a dryer to cure the ink after application so the design sticks well to the fabric.
Setting Up Your Workspace
A small space works fine to start – about 6 feet gives you enough room for a simple t-shirt printing setup. The way you arrange your workspace makes a big difference in your efficiency and print quality.
Start with a sturdy table that holds your equipment safely, especially heavy heat presses. Leave room on both sides – one side to keep your materials (blank shirts and transfer designs) and the other for finished shirts.
Good lighting helps you see details clearly. Bright lights help you catch mistakes when you line up designs or check how well they printed. Screen printing needs water nearby for cleanup and good air flow to deal with ink fumes.
Budget-Friendly Equipment Options
Starting a t-shirt printing business costs less than many people think. The gives beginners a great heat transfer option with solid construction and even heat spread.PowerPress Heat Press Machine
Screen printing has some good starter deals too. The Basic Heat Press Package comes with a 15″x15″ MAXX Clam Heat Press, pad protector, marketing materials, and $50 worth of free transfers. This complete package lets you start making professional prints right away.
Heat transfer vinyl (HTV) gives you the cheapest way to start, with a vinyl cutter and heat press package under $2,000. Print-on-demand services offer another option – you create designs while they handle the printing and shipping.
Your first investment should match what you plan to make and how much you’ll produce. Start with just what you need, then buy better equipment as your business grows. Better tools mean better products, so choose wisely even when looking for deals.
Step-by-Step Guide to Screen Printing T-Shirts
Screen printing stands out as one of the most popular t-shirt printing techniques. It offers durability and budget-friendly solutions for bulk orders. You can become skilled at this craft with practice, and the process becomes straightforward once you grasp each step.
Preparing Your Design
Start by creating or selecting artwork that works well with screen printing. Bold designs with limited colors work best when you’re starting out. Professional screen printers use to prepare designs. Note that “garbage in equals garbage out” – quality artwork at the start leads to better final prints.programs like Illustrator, Photoshop, or Procreate
Screen printing applies one color at a time, so you’ll need to separate your design by color. Each color needs its own screen. Print each layer onto film positives (transparent sheets) with black ink after separating colors. This blocks light during the exposure process. Your transparencies should be dark enough that you can barely see light through the black areas.
Creating Your Screen
Your next step is coating your screen with photo emulsion. Clean the mesh with screen printing degreaser first to avoid pinholes or bumps. Mix your emulsion according to package directions by combining sensitizer with emulsion.
Work in a darkened room to apply a thin, even coat of emulsion on both sides of the screen with a squeegee. Let the screen dry horizontally in complete darkness for 1-3 hours. Place your film positive (with design reversed) on the recessed side of the dry screen. Use a light source to expose it – either a specialized exposure unit or a 150-watt bulb. Your setup determines the exposure time.
Wash the exposed screen with lukewarm water. This removes unexposed emulsion and reveals your design as open mesh areas.
Applying Ink to Fabric
Good ink application starts with proper preparation. – stir until it becomes creamy. Water-based inks need less prep time but dry faster during printing.Plastisol ink works best at around 80°F
Secure your t-shirt on a flat surface or platen with adhesive to prevent movement. Position your screen over the shirt and add a line of ink across the screen’s top. Use just enough ink – excess creates mess while too little leads to incomplete prints.
Start with a flood stroke – pull the squeegee lightly across the screen without pressure to pre-fill the design area. Follow with your print stroke by pressing down firmly while pulling the squeegee across. This pushes ink through the open mesh onto the fabric below.
Curing Your Print
Proper curing sets the ink and ensures durability and wash-resistance. Prints that aren’t cured will crack and fade quickly. Each ink type needs specific temperatures – water-based inks cure at 300°-320°F, while low-cure plastisol inks might cure at 260°F.
You have several options to cure prints:
- Heat press: Set temperature 20-30 degrees above the ink’s cure temperature. Water-based inks need 330°F with medium pressure.
- Flash dryer: Keep it 3 inches above the print for the recommended time. Room temperature and fabric type affect timing.
- Conveyor dryer: This works best for high volume and lets multiple shirts cure at once.
Test your cured print by gently stretching the fabric to check for cracking. A wash test gives you the full picture of how well your print holds up.
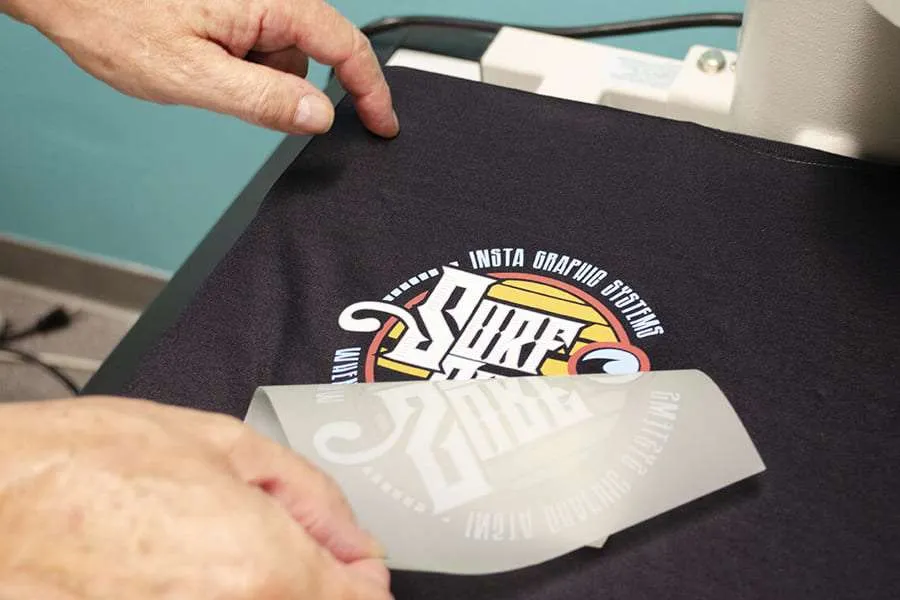
Mastering Heat Transfer Techniques
Heat transfer vinyl gives you a versatile way to print t-shirts that combines precision and accessibility. The process bonds designs onto fabric through heat and pressure. This method works great for small orders, individual-specific experiences, and projects that need vibrant colors or intricate designs.
Vinyl Cutting Basics
Creating heat transfer vinyl (HTV) designs requires proper cutting techniques. You should pick the right vinyl type for your project—standard HTV works with cotton and polyester, while specialty vinyls are perfect for nylon and stretchy fabrics. Note that you need to because you’ll cut on the adhesive side with the clear carrier sheet on top.mirror your design before cutting
A vinyl cutter or craft cutting machine delivers the most accurate results. Your settings will change based on vinyl thickness—adjust both force and speed based on what the manufacturer recommends. The next step involves careful “weeding” of your design by removing unwanted vinyl pieces until only your intended graphic remains on the carrier sheet.
Using a Heat Press Effectively
The success of heat transfer applications depends on temperature, time, and pressure. Most transfers need , though specialty materials might require lower settings.temperatures between 350-375°F
To get the best results:
- Pre-press your garment for 3-5 seconds to remove moisture and wrinkles
- Position your transfer with the carrier sheet facing up
- Apply firm to medium pressure for the recommended time (typically 10-20 seconds)
- Follow specific peel instructions—some transfers need hot peeling while others should cool completely
Heat press machines work better than irons because they distribute heat evenly and maintain controlled pressure across your entire design.
Troubleshooting Common Transfer Issues
Your transfers might not stick properly due to low temperature, weak pressure, or wrong application time. Vinyl that won’t adhere usually means you should increase pressure or pre-press the garment again to eliminate moisture.
Multilayered designs need compatible materials—metallic vinyl should go on top rather than serve as a base layer. Dark fabrics can cause color migration where the shirt’s dyes transfer to the vinyl. Specialized anti-sublimation HTV helps prevent this discoloration.
Your transfers will last longer if you wash garments inside out in cold water and skip high-heat drying.
How to Design T-Shirts That Print Well
T-shirt designs that catch people’s eyes need a good grasp of how design elements work with different printing methods. Your final product’s success depends on how your design looks on fabric.
Choosing the Right Colors for Your Method
Your color choices largely depend on the printing method you pick. Screen printing works better with fewer colors—this helps your budget and keeps designs clear. Too many colors might make your design look messy. Screen printing excels with solid, distinct colors that you’ll find in logos, text, and graphics with sharp edges.
DTG printing gives you more creative freedom with complex color patterns and gradients because it handles . Heat transfer vinyl works differently—metallic vinyl performs better as a top layer instead of a base.unlimited colors
The Pantone Matching System (PMS) helps you match colors exactly. This standard system will give a precise color match during printing. Your monitor’s color calibration prevents any surprises when your digital design moves to fabric.
Typography Tips for T-Shirt Designs
Typography packs an emotional punch in t-shirt designs. A good rule limits you to three fonts per design to keep things clean. Two levels usually work best: your main message and a subhead.
Here are some practical font guidelines:
- Big block letters don’t work well—you’re making a t-shirt, not a billboard
- Letter spacing needs careful attention to look professional
- Pick fonts that go together with your artwork or create purposeful contrast
- Clear reading beats fancy looks, especially in smaller text
Double-checking spelling and punctuation before finishing your design is crucial. One printer found that there was an expensive lesson after making 200 “Happy Brithday” shirts.
Software Options for Beginners
Several user-friendly design tools help create professional t-shirt designs without much training. Canva stands out with its easy-to-use interface and many templates. You can quickly adjust text, fonts, and colors while using lots of design elements.
Adobe Express comes with templates and Adobe Fonts integration, which makes typography easier. Adobe Illustrator remains the top choice for vector graphics and professional t-shirt design.
GIMP and Inkscape are powerful free options to create graphics without paying subscription fees. You can start making impressive t-shirts no matter your skill level.
Conclusion
T-shirt printing opens up countless ways to express creativity and build business opportunities. Screen printing works best for bulk orders, and DTG proves perfect for intricate designs. Heat transfer vinyl gives you the perfect starting point, while dye sublimation creates vibrant all-over prints.
Your success with t-shirt printing hinges on picking the right technique that matches your needs. You need to think over several aspects – order quantities, design complexity, fabric types, and your budget before you pick a method. The setup of your equipment and workspace organization are vital parts of creating high-quality prints.
The path to becoming skilled at these techniques needs time and practice. Begin with basic designs and follow the right steps as you move toward complex projects. Your consistent effort and eye for detail will help you develop skills to create professional custom t-shirts that make their mark in the market.
FAQs
Q1. What is the best t-shirt printing method for beginners?
For beginners, heat transfer vinyl (HTV) is often the most accessible method. It requires minimal equipment – primarily a vinyl cutter and heat press – and allows for creating professional-looking apparel even on a limited budget. HTV works well on various fabrics and offers vibrant, durable prints.
Q2. How do I choose the right colors for my t-shirt design?
The printing method you select influences your color choices. Limit your palette to solid, distinct colors for clarity when printing on screen. DTG printing allows for more complex color patterns and gradients. Consider using the Pantone Matching System (PMS) for precise color matching and calibrate your monitor to ensure accurate color reproduction.
Q3. What equipment do I need to start screen-printing t-shirts?
Essential equipment for screen printing includes frames, screens, squeegees, and inks. A starter kit like the Speedball Intermediate Kit is a good option for beginners. You’ll also need a flat surface or platen to secure the t-shirt, and a heat source for curing the ink after printing.
Q4. How do I ensure my t-shirt prints are durable and long-lasting?
Proper curing is crucial for durable prints. Different inks require specific temperatures – water-based inks typically cure at 300°-320°F, while low-cure plastisol inks may cure at 260°F. Use a heat press, flash dryer, or conveyor dryer to cure your prints. Perform a stretch test and wash test to verify the print’s durability.
Q5. What software is recommended for designing t-shirts?
For beginners, user-friendly options like Canva offer intuitive interfaces and extensive template libraries. Adobe Express provides templates and integration with Adobe Fonts. For more advanced capabilities, Adobe Illustrator is the industry standard. Free alternatives like GIMP and Inkscape are also available for those on a budget.